Identify the shell material and paint system, plan which layer the viewer sees first, and test the colour stack on compatible scrap.
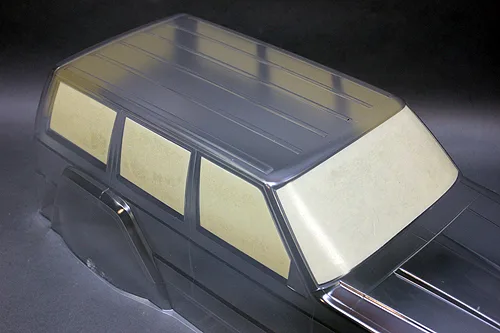
Manufacturer workshop image: Axial Jeep Cherokee polycarbonate shell with window masks fitted.
Specific to the pictured Axial Jeep Cherokee shell; supplied masks and window shapes are not universal.
Axial Adventure; AX90046 SCX10 II Jeep Cherokee Kit Build Series – Part 9 (photographer not identified) · Manufacturer copyright; permission required before public release
Photo credit & source ↗View the teaching schematic
The clear shell is part of the paint system. On a typical clear polycarbonate RC body, you view the colour through the shell rather than looking directly at an exposed exterior coat. That makes preparation and layer order worth planning on paper. This guide is a project workflow, not a substitute for the body and paint labels.
Identify the material before the colour
Tamiya's body-painting guide distinguishes polycarbonate bodies painted from the inside from styrene bodies finished differently. It specifies paint intended for the material. Do not apply this clear-shell workflow automatically to a hard body, an already painted shell or an unknown replacement. Find the product instructions first.
Put the shell, compatible paint, masks and instructions together before buying extra colours. Read ventilation, ignition, protective-equipment and disposal directions on the actual product. If you cannot meet those conditions in your workspace, postpone painting. A closed room with a sheet of newspaper is not a planned spray area. Keep the vehicle, battery and charger away from the painting task.
Draw a mask map
Make a simple side, roof and front sketch. Give each region a colour name and a sequence number. Label windows that must remain clear, areas receiving decals later and sections that need a backing colour according to the paint maker. The aim is not beautiful drawing; it is a plan another person could follow without guessing.
Try the Bodyshop sketch tool for broad colour relationships, but remember that a screen cannot predict opacity, metallic effect, adhesion or the final paint finish. Save a photograph of your paper plan alongside the shell's part number.
Think in viewing order
For inside painting, the first layer against the shell is the first layer seen from outside in that region. Pro-Line's painting tutorial illustrates masking the later colour areas, working dark to light in its example and using a backing colour for translucent paint. That is a useful example, not a guarantee that every paint system uses the same sequence.
Here is an original planning exercise: a shell with opaque black side panels, yellow roof and clear windows. On paper, mark the black regions as the first exposed areas, keep the roof and windows masked, then write the subsequent unmasking stages. Before following that plan, confirm the yellow paint's required backing and compatibility. If you change to a translucent yellow, revisit the plan rather than treating the colour name as the whole specification.
Rehearse on a test piece
Use suitable spare material from the same kind of shell, if available, to test the proposed paint stack under the paint maker's directions. Label the sample with product names, order and the date you made it. Look through it from the viewing side. The sample is your own observation, not evidence that another brand or material behaves the same way.
Tamiya's preparation sequence includes cleaning, drying, applying interior masks and retaining the exterior protective film during painting. Do the prescribed preparation before masking; touching freshly prepared areas or rushing damp corners undermines the point of the process. Follow product directions for intervals between coats and final curing rather than adopting a universal time from an unrelated tutorial.
Finish the project, not just the colour
Pause before removing a mask if you have lost track of the next layer. Compare the body with the map, not your memory. After the instructed curing and film-removal stages, inspect under good light before adding decals. Keep the sample and paint record for later repairs. A restrained two-colour scheme with a documented process is a much better first learning project than a complicated design you cannot reproduce.
Leave with a useful record.
This is a reading aid, not a safety certification. Checks stay only on this page and reset when you reload.
Sources & scope
Primary references checked September 19, 2026. These dates describe source review, not publication of this site. Examples labelled hypothetical or illustrative are not tests.
Tamiya — Learn how to paint an RC body
Supports: Body materials and material-specific paint; Inside painting, cleaning, masks, protective film and ventilation/fire precautions.
Limit: Japanese manufacturer tutorial; not a paint-specific safety data sheet or universal curing schedule.
Source publication: not established · Checked: 2026-09-19
Pro-Line Racing — Body painting and preparation tutorial
Supports: Masking later colours and a dark-to-light worked scheme; Translucent paint and backing-colour example.
Limit: Illustrated example, not a compatibility or exact cure-time specification.
Source publication: not established · Checked: 2026-09-19