Use the exact manual, preserve front/rear parts, bleed deliberately, then compare paired motion.
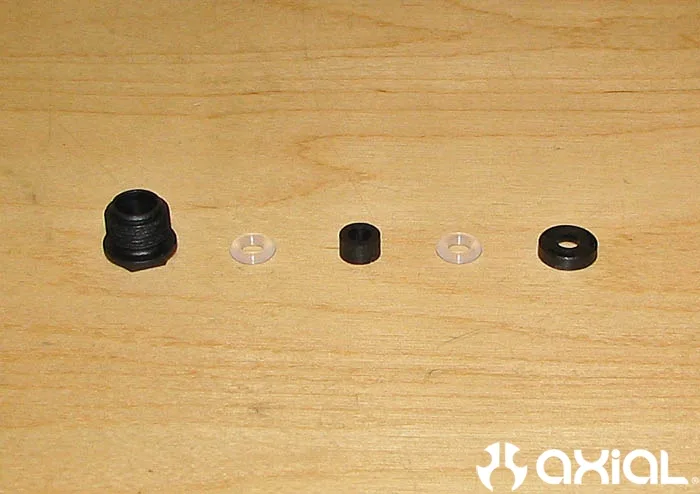
Manufacturer workshop image: Axial competition-shock cartridge parts before assembly.
Specific to Axial competition shocks; seal stack, tools, oil and assembly order vary by shock model.
Axial Adventure; Shock Building Tips (photographer not identified) · Manufacturer copyright; permission required before public release
Photo credit & source ↗View the teaching schematic
A shock service should leave you with assemblies you can compare, not just fresh oil. Start by deciding whether this is a repair that restores the existing setup or an intentional tuning change. Keep those jobs separate: if you change fluid, pistons and springs while correcting a leak, you will not know which change explains the next run.
Identify each assembly before opening it
Remove the battery and clean the outside of each shock. Set out a clean tray, suitable containers for old fluid, and the exact manual. Label front-left, front-right, rear-left and rear-right; photograph mounting holes, spacers and spring retainers. Keep the parts separated while working. Similar-looking assemblies are not permission to mix their internals.
Team Associated's SC10 4x4 Factory Team manual illustrates separate front and rear shock specifications and different bladder-style and emulsion-style assembly procedures. It is a useful concrete warning against treating every oil-filled shock as the same design. Its fluid choices and fill dimensions are not recommendations for your chassis.
Make a paired service record
Write down the intended spring, piston, fluid product and assembly method for each end of the car. Copy those identities from your own documentation, not from memory or the colour of an unlabelled bottle. If the current setup is unknown, describe it as unknown and establish the manufacturer's baseline before testing alternatives.
Follow the manual for disassembly and seal inspection. Look for scored or bent shafts, damaged seals, worn mounting eyes and distorted caps. Record the finding before cleaning it away. Do not use extra tightening to compensate for a damaged sealing surface. A component that cannot seat as illustrated is a reason to stop and check the parts list.
Follow the correct fill and bleed procedure
The SC10 manual's illustrated procedures include moving the shaft slowly to release trapped air, waiting for bubbles and bleeding excess fluid through the appropriate cap arrangement. Their order differs with shock construction. The useful lesson is to identify the design first; do not combine half of one procedure with half of another.
For your own shocks, follow the specified shaft position, fill level and cap sequence. Keep the work area clean while parts are open. Do not invent a universal waiting time, oil amount or rebound target. Capture the oil identity and any deviation in your record so a future service starts with facts.
Compare before changing another variable
After assembly, perform the manual's movement and leak checks. As an editorial consistency check, compare the two shocks intended to be identical at the same end of the car. If one catches or behaves differently, revisit its components and assembly record before selecting another spring.
Hypothetical example: after servicing the fronts, one shaft stops short during gentle hand compression. Do not force it or use the car's weight to push it through. Check the correct bleed procedure, shaft condition and part arrangement; ask the manufacturer if the discrepancy remains unexplained. That is an unresolved service finding, not a damping preference.
Check the installation too
Reinstall each unit in the recorded position, secure the specified hardware and cycle the suspension gently with power disconnected. Check spring retainers, mounting clearance and any contact at the ends of travel. Settle the car using the manual's method before measuring ride height.
Finish the record with three separate observations: components used, bench movement and installed movement. Only then move to the shock-fluid lab to explore a tuning idea or the A/B/A guide to compare a deliberate change. A repeatable service gives that experiment a defensible starting point.
Leave with a useful record.
This is a reading aid, not a safety certification. Checks stay only on this page and reset when you reload.
Sources & scope
Primary references checked September 19, 2026. These dates describe source review, not publication of this site. Examples labelled hypothetical or illustrative are not tests.
Team Associated — SC10 4x4 Factory Team manual: shock assembly
Supports: Separate front/rear specifications; Distinct bladder and emulsion assembly examples; Slow shaft movement, bubble release and design-specific bleeding.
Limit: Manufacturer PDF text verified through the search index. Historical model example; numerical settings and exact sequence must come from the reader’s own shock manual.
Source publication: not established · Checked: 2026-09-19